
Contents
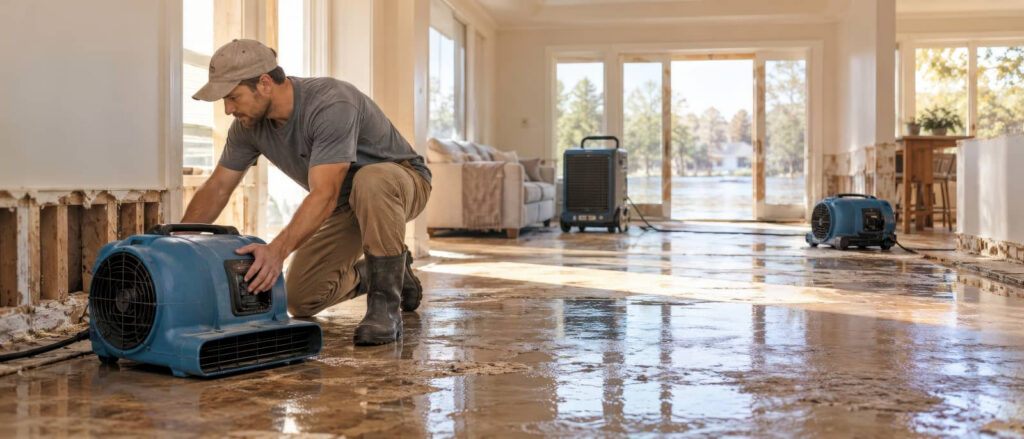
When you handle water extraction services, you need the right equipment for each stage of the job. You use submersible pumps for standing water, wet/dry vacuums for small spills, and truck-mounted extractors for larger losses. Then you pair them with air movers, dehumidifiers, and moisture meters to control drying and verify results. The real difference often comes from how these tools work together.
Key Takeaways
- Submersible pumps remove standing water from low points quickly and efficiently.
- Wet/dry vacuums handle small spills, localized saturation, and tight areas.
- Truck-mounted extractors provide rapid, high-volume water removal for large or commercial losses.
- Air movers and dehumidifiers accelerate drying and reduce remaining moisture in materials and air.
- Moisture meters verify drying progress and guide equipment placement for complete restoration.
What Water Extraction Equipment Does
Water extraction equipment removes standing water, pulls moisture from affected materials, and helps control drying after leaks, floods, or other water damage.
You use it to reduce saturation in carpet, pad, hardwood, drywall, and structural cavities before secondary damage spreads. The equipment used for water extraction services works fastest when you match the tool to the material and volume of water.
You can improve results by moving through the space methodically, isolating wet zones, and checking hidden moisture with meters. This process supports your crew, protects the building, and helps you restore normal conditions sooner.
When you select the right system, you don’t just remove water; you create a controlled path toward safe, efficient drying for everyone involved.
Use Submersible Pumps for Standing Water
When you use a submersible pump for standing water, place it at the lowest point and keep the intake clear of debris for efficient flow.
You can move water out quickly by matching the pump’s capacity to the flood depth and discharge distance.
For deep standing water, lower the pump fully below the surface and monitor performance to prevent cavitation and maintain consistent extraction.
Pump Placement Basics
For standing water, place a submersible pump in the lowest accessible point so it can draw from the deepest accumulation first. You should keep the intake fully submerged and stable, with the hose routed so it won’t kink or lift.
Check that the pump sits on a flat surface or a protective base to limit debris intake and prevent vibration damage. If the area slopes, move the unit as water drops so you keep targeting the remaining pocket.
You’ll work more efficiently when you avoid placing the pump on loose sediment or against walls, where flow can be restricted. Stay with your team’s process, confirm power is safe, and monitor the waterline so you can adjust placement with confidence.
Quick Water Removal
Once the pump is set in the lowest point, you can start removing standing water quickly by running a submersible unit at full working capacity.
Keep the discharge hose straight and secure so you don’t lose flow or flood the work area again. You’ll get the best results when you monitor the intake for debris and clear it before it clogs.
Stay near the pump, watch the water level drop, and adjust the hose as needed to keep the unit submerged. Use a model sized for the job so your crew can work with confidence and stay on schedule.
When you move fast and stay coordinated, you protect the structure, support your team, and make the whole extraction process feel controlled and professional.
Handling Deep Standing Water
Deep standing water calls for a submersible pump that can keep its intake below the surface and move a steady volume without cavitation. You place it at the lowest point, then route discharge hose to a safe outlet so water keeps moving away from the structure.
Use a pump rated for dirty water if debris is present, and check the strainer often to prevent clogging. Keep electrical connections dry, grounded, and protected by GFCI.
As the level drops, reposition the pump to maintain prime and avoid dry running. You work as a team here: one tech monitors flow, another watches for hidden pockets and confirms complete removal.
That coordination helps you finish faster, reduce damage, and stay part of a crew that handles flooding with confidence.
Rely on Wet/Dry Vacuums for Small Jobs
For small spill cleanup, you can rely on a wet/dry vacuum to remove surface water quickly and control spread.
Its portable extraction power lets you target tight areas, corners, and low spots without setting up larger equipment.
Small Spill Cleanup
When you’re dealing with a small spill, a wet/dry vacuum gives you a fast, controlled way to remove water before it spreads or soaks deeper into the material.
You position the nozzle at the leading edge of the puddle, then move steadily to capture moisture without pushing it farther out. Use a tight seal around baseboards, tile joints, or carpet fibers so you pull up surface water efficiently.
Empty the tank before it reaches capacity to maintain suction and avoid re-depositing liquid. For your team, this tool supports quick response, clean workflow, and fewer interruptions during restoration.
After extraction, inspect the area for damp spots and repeat as needed. You’ll handle small losses with confidence and keep the site ready for the next step.
Portable Extraction Power
Portable extraction power lets you move quickly on small water losses, and a wet/dry vacuum is often the most practical tool for the job. You can position it fast, target localized saturation, and remove standing water before it spreads into adjacent materials.
Use the correct hose, tight fittings, and a sealed tank so suction stays strong throughout the task. You’ll work more efficiently when you empty the canister before it reaches capacity and check for clogs that reduce lift.
For your crew, this tool adds flexibility in tight rooms, closets, and corners where larger extractors won’t fit. When you need dependable results on minor losses, a wet/dry vacuum helps you stay ready, stay precise, and deliver clean, professional extraction every time.
Quick Drying Support
A wet/dry vacuum supports quick drying by removing residual moisture after the initial extraction pass, especially on small, localized water losses.
You use it to target corners, edges, carpet seams, and hard-to-reach low spots where larger extractors can’t maintain full contact. This tool helps you lower surface saturation fast, which shortens evaporation time and reduces the chance of secondary damage.
For tight cleanup areas, choose a unit with strong suction, a sealed hose, and the right attachment for the material you’re treating.
Keep the tank empty and the filter clean so airflow stays consistent.
When you work this way, you stay efficient, protect the affected space, and fit smoothly into a professional drying team.
When to Use Truck-Mounted Extraction
Truck-mounted extraction works best when you need rapid, high-volume water removal from large areas or heavily saturated materials. You’d choose it after burst pipes, appliance failures, or flooding when portable units can’t keep up.
Its vacuum power pulls water from carpet, pad, concrete, and structural cavities fast, helping you stabilize the job site with confidence. You’ll get the best results when you can park close to the affected area and run long hoses with minimal restriction.
This setup also suits commercial spaces, multifamily properties, and other sites where speed and capacity matter. If you’re part of a restoration team, using this equipment helps you work efficiently, protect materials, and deliver the level of response your clients expect.
Deploy Air Movers to Speed Drying
Position air movers to drive moisture off surfaces and accelerate evaporation after water extraction. You’ll get better results when you aim each unit across wet floors, baseboards, and carpet edges, not straight down.
Create a consistent airflow path so the whole drying zone works as a team.
- Place units 6 to 10 feet apart for even coverage.
- Angle the output along surfaces to lift residual water.
- Keep cords clear and secure to protect the job site.
You should reposition air movers as materials begin to dry, because airflow needs change fast.
Listen for weak spots, check for damp corners, and adjust quickly. When you use them correctly, you help the space dry faster, reduce downtime, and stay aligned with a professional water-restoration crew.
Add Dehumidifiers to Remove Moisture
Once the air movers are running, add dehumidifiers to pull water vapor out of the air and prevent secondary damage. You’ll create a controlled drying environment that helps your team work faster and with less risk of lingering odors, swelling, or microbial growth.
Position the unit in the most affected area, close doors when possible, and let it cycle continuously so it can lower ambient humidity efficiently. Empty or drain the reservoir as directed, and keep intake and exhaust paths clear for steady airflow.
In a professional water extraction setup, you rely on this step to support the rest of the drying process. When you use dehumidifiers correctly, you protect materials, stabilize conditions, and stay aligned with the standards your crew expects.
Use Moisture Meters to Check Dryness
After you’ve set up airflow and dehumidification, use moisture meters to verify that materials are actually drying. You’ll get reliable readings on drywall, wood, and subflooring, so you can confirm progress instead of guessing. Track the same spots each day and compare them to your baseline numbers.
- Press the pins or sensor firmly against the material.
- Record readings in affected and unaffected areas.
- Watch for values that level off near normal.
If readings stay elevated, the structure still holds moisture and needs more drying time. You’ll work more confidently when you measure instead of assume, and your team can stay aligned on clear targets.
Dryness checks help you protect materials, reduce callbacks, and finish the job with precision.
Which Tools Do Pros Use Together?
Pros typically use extraction equipment as a system, not as separate tools. You’ll pair a wet vac or truck-mounted extractor with air movers, dehumidifiers, and moisture meters to move water out, then pull hidden moisture from materials.
First, you extract standing water fast. Next, you place air movers to increase evaporation across floors, walls, and cavities. Then, you run dehumidifiers to capture that airborne moisture before it settles back.
You use moisture meters to verify dry standards, spot trapped water, and guide repositioning. In the field, this coordinated setup helps you work like the pros you’re aiming to join: efficient, consistent, and accountable.
When you combine the right tools, you don’t just dry a space—you protect structure, reduce risk, and keep the job moving with confidence.
Frequently Asked Questions
How Quickly Should Water Extraction Begin After Flooding?
You should begin water extraction within 24 hours, ideally immediately. You’ll limit structural damage, mold growth, and contamination, while preserving materials and reducing costs. Quick action helps you protect your property and restore normalcy faster.
Can Water Extraction Prevent Mold Growth?
Yes, you can greatly reduce mold growth by extracting water quickly, lowering moisture, and drying affected materials. You’ll protect your space, limit spores, and improve recovery when you act fast and monitor humidity closely.
Is Water Extraction Safe for Hardwood Floors?
Yes, if you act fast and use controlled extraction, you can protect hardwood floors. You’ll limit warping, cupping, and staining by removing water quickly, monitoring moisture, and drying the boards with proper airflow and dehumidification.
How Much Does Professional Water Extraction Cost?
You’ll usually pay $300–$1,000 for professional water extraction, depending on damage size, response time, and drying needs. Think of it as a safety net: faster service can save your floors, walls, and peace of mind.
Do Homeowners Need to Leave During Extraction?
Usually, you don’t need to leave during extraction, but you may need to avoid affected areas. You’ll stay safer and feel included when you follow technicians’ instructions, keep pets away, and maintain clear access.
Summary
When you choose the right equipment, you don’t just remove water—you crush the damage before it can get a foothold. Submersible pumps tackle deep standing water, wet/dry vacuums handle minor messes, and truck-mounted extractors hammer large-scale losses fast. Then air movers, dehumidifiers, and moisture meters finish the job with laser-focused drying control. Used together, these tools turn a soggy disaster into a tightly managed, professional restoration process.
Recent Posts
How Long Water Extraction Services Usually Take
Water extraction usually takes a few hours, but your timeline depends on the size of
Water Extraction Services and Structural Drying
You need rapid water removal, you need controlled structural drying, and you need accurate moisture
Water Extraction Services for Flooded Homes Explained
If a pipe bursts in your basement at 2 a.m., you need fast water extraction