
Contents
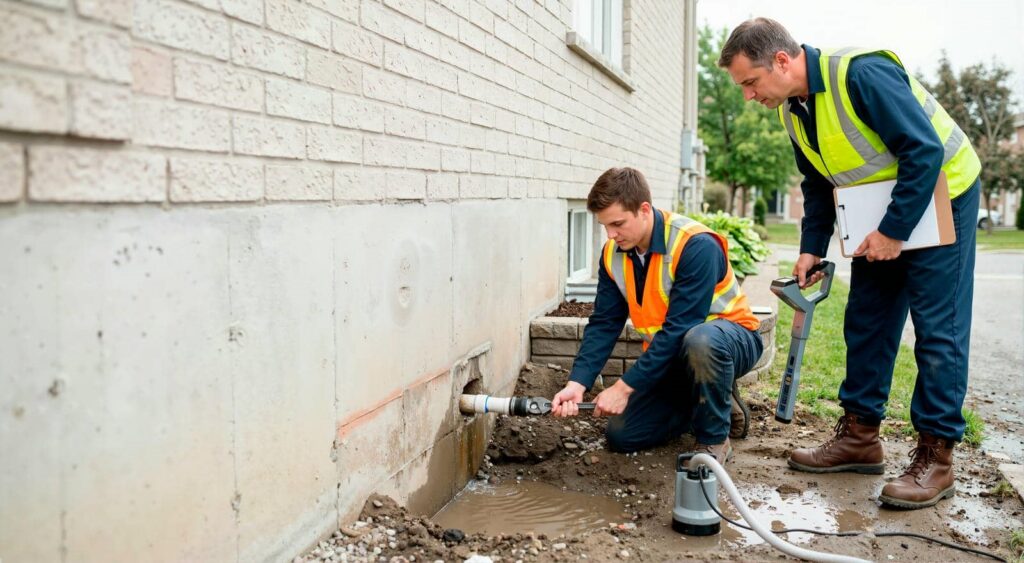
You may not realize that water damage restoration isn’t just about removing visible water; the real work starts when you target hidden moisture in walls, floors, and cavities. You’ll see pros use extractors, air movers, dehumidifiers, moisture meters, and thermal cameras to control drying with precision. But the right setup depends on what’s wet, how deep it goes, and what’s already at risk.
Key Takeaways
- Professionals use water extractors to remove standing water quickly and limit swelling, staining, and microbial growth.
- Air movers speed evaporation by pushing high-velocity air across wet surfaces like floors, walls, and contents.
- Dehumidifiers remove moisture from the air to keep drying conditions stable and prevent reabsorption.
- Moisture meters and thermal cameras help locate hidden moisture and track drying progress accurately.
- PPE, containment barriers, and HEPA filtration help protect workers and control contaminants during restoration.
What Is Water Damage Restoration Equipment?
Water damage restoration equipment is the set of specialized tools professionals use to remove moisture, dry materials, and stabilize a property after flooding, leaks, or sewage backups.
You use it to control damage fast, protect building materials, and support a safe recovery.
The water damage restoration equipment used by professionals includes meters, air movers, dehumidifiers, and sanitation tools that work together as a system.
When you understand each tool, you can follow the restoration process with confidence and know what your crew is doing at each step.
This equipment helps you reduce hidden moisture, limit mold risk, and prepare surfaces for repair.
In practice, it gives you a clear path from wet conditions to a dry, stable space.
Water Extraction Equipment
Once standing water appears, water extraction equipment becomes the first critical line of defense because it removes bulk moisture before drying can begin.
You’ll usually see truck-mounted or portable extractors, plus weighted tools that pull water from carpet and padding with strong suction. Fast extraction limits swelling, staining, and microbial growth, and it helps you feel back in control sooner.
Professionals choose the right tool for the surface and water volume, then work methodically to reduce saturation.
- You protect your floors.
- You preserve your belongings.
- You shorten the restoration timeline.
- You join a team that acts fast.
Air Movers for Faster Drying
After bulk water is removed, air movers take over by accelerating evaporation from floors, walls, and contents. You place them to push a steady, high-velocity stream across damp surfaces, breaking the boundary layer that slows drying.
In practice, you aim the airflow along baseboards, under cabinets, and across carpet seams so moisture leaves materials faster. You’ll usually set them in overlapping patterns to cover the whole affected area without dead zones. Their compact, portable design lets your crew reposition them quickly as conditions change.
When you use them correctly, you cut drying time, reduce swelling and warping, and help your team keep the restoration moving as one coordinated effort. For your crew and your clients, that means cleaner progress and less disruption throughout the job.
Dehumidifiers That Remove Moisture
Dehumidifiers pull moisture out of the air so materials can dry instead of reabsorbing humidity from the room. You use them to create a stable drying environment, which helps walls, floors, and contents release water faster.
When you choose the right unit, you support the rest of your drying setup and keep conditions under control.
- You reduce that damp, heavy feeling fast.
- You help protect materials from lingering moisture.
- You make the space feel safer and more manageable.
- You join a process that gets your property back on track.
Professionals often place dehumidifiers after initial extraction and run them continuously until humidity drops to a workable level.
You’ll usually notice better progress when airflow and dehumidification work together as a team.
Moisture Meters and Thermal Cameras
Moisture meters and thermal cameras help you find what the eye can’t see, so you can target drying where it’s needed most.
You use a moisture meter to check wood, drywall, and flooring for elevated readings, then compare them across affected areas. That gives you a clear map of where water lingers.
A thermal camera adds another layer by showing temperature differences that often signal hidden moisture behind surfaces. Together, these tools help you verify damage, track progress, and confirm when materials are drying properly.
You avoid guesswork, save time, and keep the restoration plan focused. When you work with these instruments, you join a crew that values accuracy, speed, and dependable results for every property you restore.
Sublurface Drying Tools
When water seeps beneath flooring or into wall cavities, you need sub-surface drying tools to pull moisture out from areas surface equipment can’t reach. You place these tools where trapped water hides, then create controlled airflow and suction that speeds evaporation.
When you use them correctly, you help protect structural materials, reduce lingering dampness, and keep your restoration team moving together with confidence.
- Injectidry panels target hardwood and subfloor layers.
- Floor drying mats spread airflow evenly across wet surfaces.
- Weighted suction mats draw moisture from tight spaces.
- Cavity drying systems move air through wall voids.
You’re not guessing—you’re using proven methods that support faster, cleaner recovery. Trust these tools, and you’ll feel ready to bring a property back to normal.
HEPA Air Scrubbers
Once trapped moisture is being pulled from floors and wall cavities, you also need to control the airborne contaminants that get stirred up during drying.
HEPA air scrubbers draw room air through prefilters and a true HEPA stage, capturing fine dust, spores, and debris before they recirculate. You place them where airflow can sweep affected zones and keep them running continuously while materials dry.
Adjust their output to support overall air movement without short-circuiting the drying setup. You’ll notice the space feels cleaner because particles that once floated back onto surfaces stay trapped inside the machine.
In a professional restoration crew, this tool helps you maintain a more stable work area and gives occupants confidence that the project is being handled with care and precision.
Safety Gear and Containment
You’ll need personal protective equipment like gloves, respirators, and eye protection before you enter a damaged area.
Set up area isolation barriers to keep moisture, debris, and airborne contaminants from spreading to clean spaces.
Personal Protective Equipment
Before any drying starts, personal protective equipment and containment measures help keep crews safe and stop contamination from spreading. You suit up with gloves, boots, goggles, and respirators so you can work confidently in wet, dirty spaces. Your PPE reduces contact with bacteria, broken materials, and airborne particles, while helping your team stay focused and united.
Proper gear also supports fast cleanup by letting you move through affected areas without hesitation.
- You protect your hands from sharp debris.
- You shield your eyes from splashes and dust.
- You breathe more safely around mold and odors.
- You keep your crew feeling capable, steady, and included.
When you wear the right protection, you help restore the property and your crew’s morale at the same time.
Area Isolation Barriers
With PPE in place, you can control the work zone by setting up area isolation barriers that separate wet, contaminated spaces from clean ones. Use plastic sheeting, zipper doors, and tape to build a tight enclosure around the affected area.
These barriers help you direct foot traffic, keep the job organized, and let your team work with confidence. You’ll also protect adjacent rooms, furniture, and finishes from moisture spread during extraction and drying.
Secure seams to framing, floors, and ceilings so the barrier stays stable while equipment runs. Label entry points clearly so everyone knows where to pass through.
When you create a defined containment zone, you make the restoration process smoother, safer, and more coordinated for the whole crew.
Contaminant Exposure Control
Contaminant exposure control starts with the right safety gear and a sealed work area. You protect your team and clients by wearing gloves, respirators, goggles, and disposable suits before you enter affected rooms.
You also keep dust, spores, and fibers from spreading by maintaining negative pressure, using plastic containment, and running HEPA filtration. That discipline helps everyone feel confident that the job site is under control.
- Fit PPE correctly so you don’t inhale hidden hazards.
- Seal openings to keep contaminants where they’re found.
- Monitor airflow to support safe cleanup.
- Remove waste promptly so your crew stays focused and included.
How Pros Pick The Right Equipment
Pros choose water damage restoration equipment by matching each tool to the job’s moisture level, material type, and drying timeline.
You’ll see them start with moisture meters and thermal imaging to map hidden saturation, then size extractors, air movers, dehumidifiers, and specialty attachments to the affected space.
If you’ve got carpet, wood, drywall, or concrete, they’ll select equipment that fits the substrate so you can dry it without causing extra damage.
They also weigh power access, containment needs, and how fast you need the area back in use.
For your team, that means less guesswork and faster progress.
When the right gear works together, you get safer conditions, better airflow, steadier moisture removal, and a restoration plan that feels under control from day one.
Frequently Asked Questions
How Quickly Should Equipment Be Deployed After Water Damage Occurs?
You should deploy equipment within 24 hours, ideally within hours, after water damage occurs. You’ll limit mold growth, reduce structural damage, and speed drying by acting fast with dehumidifiers, air movers, and extraction gear.
What Signs Indicate Hidden Moisture Inside Walls or Flooring?
You’ll spot hidden moisture when paint bubbles, flooring cups, musty odors linger, baseboards swell, or drywall stains spread; if surfaces feel cool, soft, or warped, moisture’s whisper is still inside.
Can Water Damage Equipment Prevent Mold Growth Completely?
No, you can’t rely on equipment to prevent mold completely. You can dry surfaces fast with dehumidifiers, air movers, and extraction tools, but you still need quick cleanup, monitoring, and sanitation to stop hidden moisture.
How Do Professionals Decide When Drying Is Finished?
You decide drying’s finished when moisture readings match normal conditions, materials feel stable, and humidity stays low; like a storm passing, the space settles. You verify with meters, logs, and restoration standards.
Is It Safe to Stay in a Home During Restoration?
It depends on the damage. You can often stay if crews isolate affected areas, but you shouldn’t remain if there’s sewage, mold, electrical risk, or major structural damage. Follow your technician’s safety guidance closely.
Conclusion
You now know the water damage restoration equipment professionals use to control moisture fast and prevent bigger problems. Water extractors remove standing water, while air movers and dehumidifiers speed drying and balance humidity. Moisture meters, thermal cameras, and sub-surface tools reveal hidden damage. HEPA scrubbers and safety gear protect air quality and crews. When you choose the right mix, you don’t just dry a space—you restore it with precision, speed, and confidence.
Recent Posts
Cost of Property Damage Restoration Services Explained
When you face property damage, the restoration cost can shift fast depending on the damage
Property Damage Restoration Insurance Claims Guide for Homeowners
After property damage, property damage restoration insurance claims require you to move quickly, document everything,
Property Damage Restoration Process for Homes Explained
You probably don’t know that restoration crews often start by finding hidden damage before they