Contents
Ceiling water damage can feel like a dark cloud looming over your home, but tackling it doesn’t have to be a stormy affair. By following a few practical damage repair steps, you can restore your ceiling to its former glory. Start by pinpointing the source of the moisture and evaluating the damage. What comes next could make all the difference in preventing future issues and ensuring a lasting repair.
Key Takeaways
- Conduct a thorough moisture inspection to identify visible signs of water damage and hidden leaks before starting repairs.
- Remove affected materials like wet drywall and insulation, ensuring proper disposal to prevent mold growth.
- Treat any mold or mildew with suitable cleaning solutions and apply waterproofing products to prevent future issues.
- Assess structural integrity for sagging or warped areas, reinforcing or replacing compromised beams as necessary.
- Choose high-quality, moisture-resistant ceiling paint and apply a primer if needed for a durable, finished look.
Identify the Source of Water Damage
How can you effectively tackle ceiling water damage if you don’t first identify its source? Start by conducting a thorough moisture inspection. Look for visible signs like stains, discoloration, or peeling paint. These often indicate a water source, such as a leaky roof, plumbing issues, or condensation. Check your roof for damaged shingles or flashing, as well as gutters that may be clogged. Don’t overlook plumbing fixtures and pipes inside your walls; they can easily cause hidden leaks.
If you’re unsure where the problem lies, consider using moisture meters to pinpoint areas of excessive dampness. Once you identify the source, you can address it directly, whether that means repairing a roof or tightening plumbing connections. By tackling the root cause, you prevent further damage and create a safer, more comfortable living space for yourself and your family.
Assess the Extent of the Damage
Once you’ve identified the source of water damage, it’s crucial to assess the extent of the damage to your ceiling. Start with a thorough visual inspection. Check for discoloration, sagging, or peeling paint, as these are clear indicators of water infiltration. Pay close attention to any cracks or soft spots; these may suggest structural issues that need addressing.
Next, determine whether the damage is localized or widespread. If you notice multiple areas affected, your damage assessment should include the entire ceiling space. Use a moisture meter if available to measure moisture levels in the drywall. This will help you gauge how extensive the damage is and whether any hidden areas are affected.
Document your findings with photos and notes. This information will be invaluable for repairs and any potential insurance claims. By doing a thorough assessment, you set the stage for effective repair and restoration.
Remove Affected Materials
Begin by carefully removing any affected materials from your ceiling to prevent further damage and mold growth. Start by wearing safety goggles and a mask to protect yourself from dust and debris. Use a utility knife to cut away any wet drywall or plaster, making sure to dispose of it properly. Place the damaged materials in heavy-duty garbage bags for safe material disposal.
If you encounter insulation, it’s essential to treat it with care; wet insulation should be discarded as it can harbor mold. After removing materials, double-check for any lingering moisture in the area. This step is critical, as moisture can lead to bigger problems down the line. Remember to follow local guidelines for hazardous material disposal, if applicable. Taking these safety precautions ensures you protect both yourself and your home from further issues, fostering a sense of community responsibility in your repair efforts.
Dry the Area Thoroughly
Once you’ve removed the affected materials, it’s essential to dry the area thoroughly. Use fans effectively to circulate air and speed up the drying process, and don’t forget to monitor humidity levels with a hygrometer. If necessary, consider using a dehumidifier to help eliminate excess moisture and prevent mold growth.
Use Fans Effectively
When dealing with ceiling water damage, using fans effectively can make a significant difference in drying out the area. Proper fan placement is essential; position fans to create ideal air circulation. Aim them at the wet surfaces to accelerate evaporation. Here’s a quick guide to help you maximize your fan usage:
| Fan Placement | Effectiveness |
|---|---|
| Directly under the leak | High – targets moisture directly |
| Across the room | Moderate – circulates air evenly |
| Near windows | Low – may not target wet areas effectively |
| In corners | Moderate – helps with airflow |
| Ceiling-mounted fans | High – supports ongoing airflow |
Remove Wet Materials
To effectively combat ceiling water damage, promptly remove any wet materials from the affected area. Start by taking down soaked insulation, as it can harbor mold and compromise moisture control. Dispose of any damaged drywall or plaster to prevent further deterioration. If you notice wet furniture or belongings, dry them out immediately to avoid permanent damage. Pay close attention to insulation considerations; if it’s saturated, it may need replacing to ensure your ceiling’s integrity and energy efficiency. Use fans and dehumidifiers to speed up the drying process, keeping the area well-ventilated. By taking these steps, you’ll protect your home and create a safer, healthier environment for you and your loved ones.
Monitor Humidity Levels
After removing wet materials, it’s important to monitor humidity levels in the area. High humidity can slow down the drying process and lead to mold growth. Use a hygrometer for precise moisture monitoring, ensuring levels stay between 30-60%. Here’s a quick guide to help you:
| Humidity Level | Effect | Action Needed |
|---|---|---|
| Below 30% | Dry air | Use a humidifier |
| 30-60% | Ideal range | Maintain status |
| Above 60% | Risk of mold | Increase ventilation |
Implementing effective humidity control measures will help dry the area thoroughly and protect your home from future damage. Stay vigilant, and your efforts will pay off!
Treat for Mold and Mildew
After drying the area, you need to identify any spots where mold and mildew may have formed. Use appropriate cleaning solutions, like a mix of water and vinegar or a commercial mold remover, to treat these affected areas. Finally, take preventive measures, such as improving ventilation and reducing humidity, to stop future growth.
Identify Affected Areas
While addressing ceiling water damage, it’s essential to quickly identify affected areas, as mold and mildew can develop rapidly in damp environments. Start by inspecting your ceiling for water stains; these are often the first signs of underlying issues. Pay attention to the texture of your ceiling as well—if it appears saggy or discolored, it likely indicates moisture retention. Use a flashlight to examine corners and edges, as these spots are prone to mold growth. Don’t forget to check the area above the ceiling, like attics or roofs, for leaks or condensation. The sooner you recognize these issues, the better equipped you’ll be to treat them effectively and maintain a healthy living space for you and your loved ones.
Use Appropriate Solutions
Since mold and mildew can spread quickly, it’s crucial to use appropriate solutions to treat these issues as soon as they’re identified. Begin by using a mold remover specifically designed for ceilings, ensuring it penetrates the affected area. Once cleaned, consider applying waterproofing solutions to prevent future moisture buildup. After your surface is dry, explore sealant options that create a barrier against water, helping to protect your ceiling from further damage. Remember, the right products address existing mold and contribute to a healthier living environment. Regularly inspecting and treating vulnerable areas can foster a sense of community and belonging, keeping your home safe and welcoming for everyone who enters.
Prevent Future Growth
To effectively prevent future mold and mildew growth, you need to take proactive measures that address moisture control and air circulation in your home. Start by ensuring proper ventilation in areas like bathrooms and kitchens, as this helps reduce humidity levels. Use exhaust fans and consider dehumidifiers in damp spaces. Regular inspections of your ceilings, walls, and plumbing can catch leaks early, preventing bigger issues down the line. Make it a habit to check for any signs of water damage or discoloration. Additionally, using mold-resistant paints and materials can further protect your home. By implementing these preventative measures, you’re not just protecting your space; you’re creating a healthier environment for you and your loved ones.
Repair or Replace Structural Components
When dealing with ceiling water damage, determining whether to repair or replace structural components is essential for ensuring safety and long-term durability. Begin by evaluating the affected areas for signs of compromised structural integrity. If you notice sagging or warping, especially in load-bearing beams, replacing these components might be necessary. Water damage can weaken the strength of materials, making them less reliable over time.
For less severe damage, repairs such as reinforcing beams or replacing damaged sections may suffice. Verify that any repairs restore the original strength and stability. Use high-quality materials to prevent future issues and maintain your home’s structural integrity.
Consulting a professional is often wise, as they can provide expert guidance on whether repair or replacement is best for your specific situation. Making informed decisions now can save you from more extensive and costly repairs down the line.
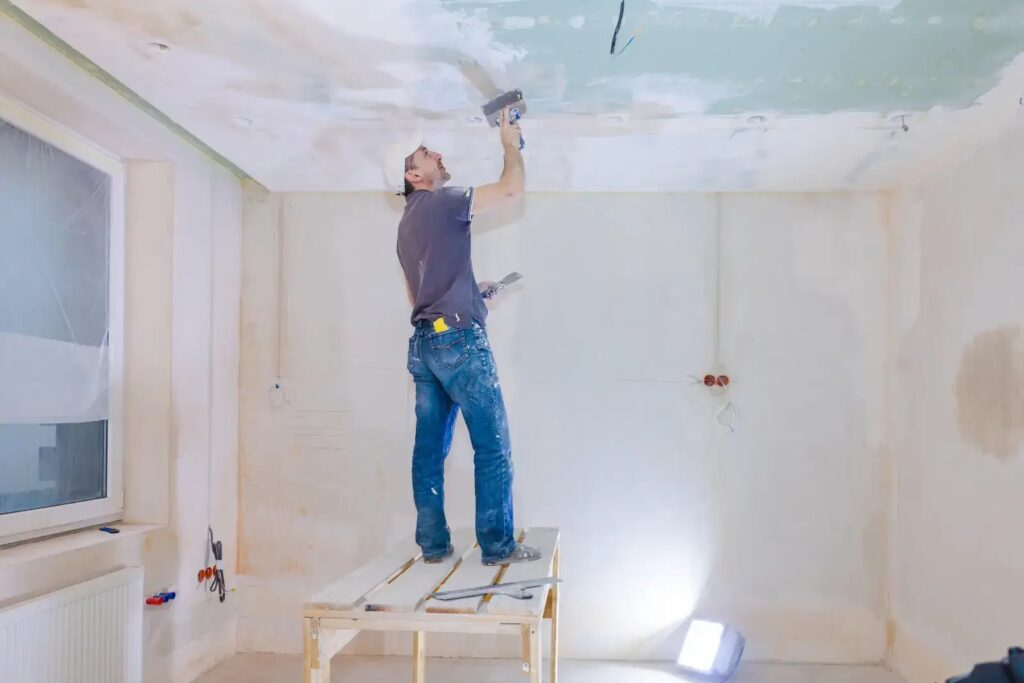
Repaint and Finish the Ceiling
After addressing any structural repairs, the next step is to repaint and finish the ceiling to restore its appearance and protect it from future damage. Start by selecting a high-quality ceiling paint that’s specifically designed to resist moisture and stains. This will not only give you a fresh look but will also help prevent future issues.
Before applying paint, verify the surface is clean and dry. You might want to apply a primer first, especially if the stains are still visible. Once the primer is dry, use a roller for even application, reaching all corners.
For the finish texture, consider what suits your space best. A flat finish hides imperfections well, while a satin or semi-gloss finish can add a bit of sheen and is easier to clean. Don’t rush this step; taking your time will yield beautiful, lasting results that enhance your home’s overall charm.
Frequently Asked Questions
How Can I Prevent Future Water Damage to My Ceiling?
To prevent future water damage to your ceiling, schedule regular maintenance and conduct roof inspections. You’ll catch potential issues early, ensuring your home stays safe and dry, and you’ll feel more secure in your space.
What Tools Do I Need for Ceiling Water Damage Repair?
For ceiling repair, you’ll need essential tool types like a drywall saw, putty knife, and paint roller, alongside effective repair techniques for a seamless finish.
How Long Does the Drying Process Typically Take?
The drying duration usually spans 24 to 48 hours, depending on moisture levels and ventilation. You should monitor progress closely, ensuring the area remains well-ventilated to promote efficient drying and prevent further damage.
Can I Repair Water Damage Myself or Hire a Professional?
If you’re handy, DIY tips can save you money, but consider cost considerations like potential mistakes. For extensive damage, hiring a pro might be wiser.
What Are the Signs of Hidden Water Damage in Ceilings?
You’ll notice signs of hidden water damage in ceilings through mold growth, discoloration, or peeling paint. Using moisture detection tools can help pinpoint issues, ensuring you address problems before they escalate into larger concerns.
Review
In tackling ceiling water damage, you’ll find that each step seamlessly leads to the next, almost like a puzzle falling into place. By identifying the source, evaluating the damage, and addressing issues methodically, you restore your ceiling and prevent future problems. The satisfaction of a job well done will surprise you, especially when you see that fresh coat of moisture-resistant paint. With these tips, you’re well on your way to a resilient and beautiful ceiling.
Recent Posts
10 Best Flood Damage Restoration Methods for Homes
When disaster strikes your home with flood damage, knowing the best restoration methods can make
Top Flood Damage Restoration Techniques for Homes
Floods can devastate homes, yet effective restoration flood damage techniques can bring them back to
Step-by-Step Guide for Ceiling Water Damage Repair
Imagine standing beneath a sagging ceiling, water stains spreading like dark clouds overhead. It’s essential