Contents
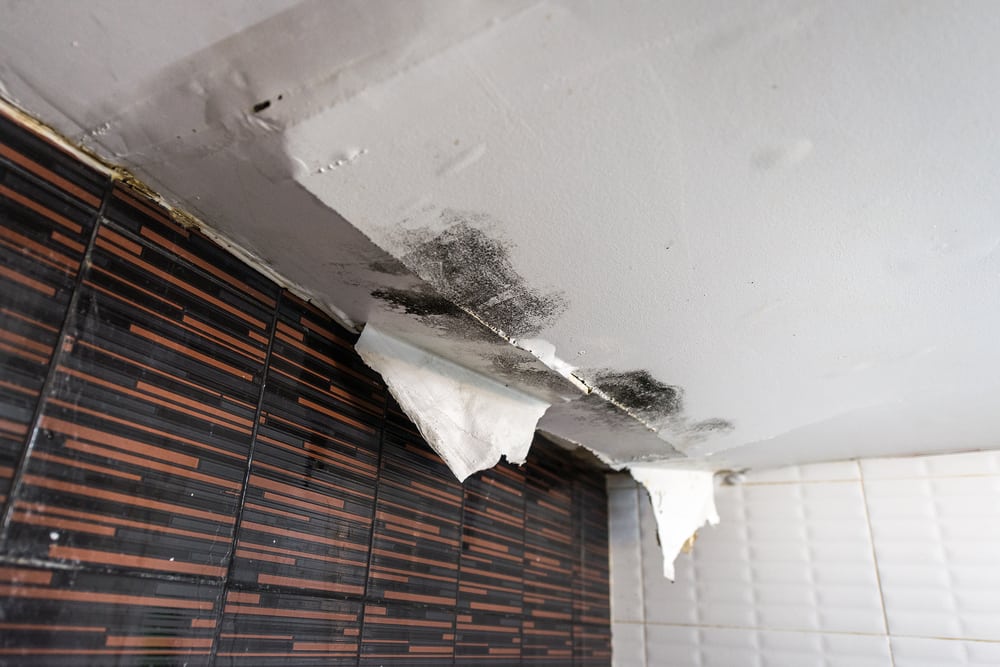
Water damage can be a big problem, especially if it is in your home. The impact of water damage on your ceiling is not only aesthetically unpleasant but also structurally dangerous. Water-damaged ceilings can collapse and cause serious injuries to those below them.
This article will give you some tips on how to fix a water-damaged ceiling that has started leaking.
Step 1 – Call an Expert
You should always call a professional when dealing with water damage. If you try to fix it yourself, you could make the problem worse or even cause structural damage to your home. A professional will know exactly what needs to be done and will have all the tools needed to get the job done right away.
If your ceiling has been damaged by water, do not try to fix it yourself. You could end up causing more damage instead of fixing the problem. It is always best to call professionals who know what they are doing and will treat your home with care and respect.
Step 2 – Remove Water from the Ceiling
Once you have identified where water is coming from, it is time to remove as much as possible from the ceiling before any further damage occurs. You will want to start by turning off any sources of water such as sprinklers or leaking pipes so that there is no more water coming through the ceiling at that location until repairs have been made.
You may also want to turn off power sources if they are close enough to where you are working so that nothing gets damaged by accident during this process.
You will want to remove as much excess water as possible before it damages anything else in your home. You may need a bucket or sponge for this part — just make sure there are no holes in them so they do not leak onto your carpet or flooring!
Use a towel or mop if necessary to soak up as much of the moisture as possible.
If you have pets at home, make sure they are not licking or drinking from the puddles on the ground because they could get sick from ingesting bacteria found in standing water. Your pet might also try to drink from other areas where there is no standing water (like bathtubs).
Step 3 – Assess the Damage and Repair any Cracks or Holes
The next step is to determine how bad the damage is. If there are only a few minor spots, you may be able to patch them with spackling compound (a mixture of sand and glue). But if there is any significant structural damage, you will need to hire a professional contractor.
Now, you should patch any cracks or holes in your ceiling with spackling compound or drywall joint compound according to the manufacturer’s instructions. Then sand down any rough edges using 120-grit sandpaper until they are smooth.
Alternatively, you can just hire a professional like Zona Restoration to do this step.
Recent Posts
Fire Damage Restoration Timeline for Homes
A house fire can turn a normal day into a long recovery in minutes. You’ll
What Homeowners Should Do After a House Fire
If a house fire leaves smoke damage through your hallway, you need to act in
5 Ways Soot Damage Can Affect Your Home
Soot damage can do more than leave dark stains on your walls. It can corrode