Contents
You might not realize that even a small leak can lead to significant ceiling water damage if left unchecked. Identifying the extent of the damage is essential before you can take the necessary steps to fix it. In the following sections, you’ll learn practical tips to effectively address this issue and prevent costly repairs down the line. Understanding these steps can save you time and hassle when tackling your ceiling repair challenges.
Key Takeaways
- Assess the extent of the damage using moisture detection tools and document findings for effective restoration.
- Identify and stop the source of water by inspecting pipes, fixtures, and the roof for leaks.
- Carefully remove compromised ceiling materials while wearing protective gear to prevent mold exposure.
- Thoroughly dry the affected area with dehumidifiers and fans to prevent future mold growth.
- Repair the ceiling by replacing damaged materials and matching finishes before repainting for a uniform look.
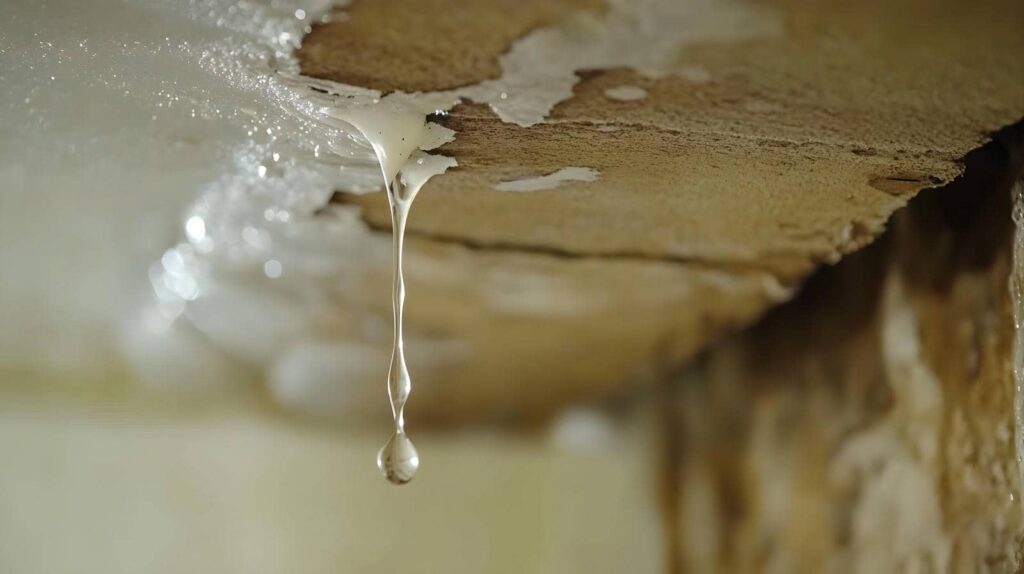
Assess the Extent of the Damage
Before diving into repairs, it’s vital to assess the extent of the water damage in your ceiling. Start with a thorough damage evaluation. Look for visible signs like stains, discoloration, or sagging areas. These indicators can reveal how long moisture has been present and its potential impact on structural integrity.
Next, use moisture detection tools like a moisture meter to identify hidden damp spots. This step is important, as water can seep into materials, causing unseen damage. If you find high moisture levels, mark these areas for further inspection.
Don’t forget to check the surrounding walls and insulation, as water can spread beyond the ceiling. Document your findings, as this will help guide your repair efforts. Taking these initial steps ensures your safety and sets a solid foundation for effective repairs. Your home deserves proper care, and understanding the damage is the first step toward restoration.
Stop the Source of Water
To effectively repair ceiling water damage, you must first stop the source of the water. Identifying and addressing the water source is essential to prevent further damage and ensure a successful repair. Begin by performing leak detection around your home. Here are some steps to help you pinpoint the issue:
- Check for visible leaks in pipes or fixtures.
- Inspect your roof for missing shingles or damage.
- Look for condensation around windows and doors.
- Examine appliances like dishwashers and washing machines for leaks.
Once you’ve identified the water source, take immediate action. This might mean repairing a leaky pipe, sealing a roof leak, or tightening connections on appliances. Remember, ignoring the source will only lead to more extensive damage. By tackling the problem head-on, you’re not just fixing the current issue; you’re safeguarding your home for the future.
Remove Affected Materials
Start by carefully removing any affected materials from the ceiling to prevent mold growth and further damage. Begin with the drywall or plaster that shows signs of water damage. Use a utility knife to cut away the compromised sections, and be sure to wear protective gear like gloves and a mask, as mold spores can be harmful.
Once you’ve removed the damaged materials, properly dispose of them in sealed bags to minimize the risk of spreading mold. Check for any insulation that might also be affected; if it’s wet, it should be discarded as well.
Make sure to document the damage for insurance purposes before you dispose of anything. Proper material disposal is essential in your mold prevention efforts, ensuring your repair work stands the test of time. By addressing the damaged materials promptly and thoroughly, you’re taking significant steps toward restoring your ceiling and maintaining a safe environment.
Dry the Area Thoroughly
After removing the affected materials, it’s important to focus on drying the area thoroughly to prevent further damage and mold growth. Proper moisture removal is essential, and you should act quickly to ensure the space is completely dry. Here’s how you can effectively dry the area:
- Use dehumidifiers: These will help extract moisture from the air.
- Open windows: This promotes air circulation, allowing fresh air to flow in and damp air to escape.
- Fans are your friends: Set up fans to direct airflow across the affected surfaces, speeding up the drying process.
- Check for hidden moisture: Look in walls and ceilings for any remaining dampness that needs addressing.
Repair and Restore the Ceiling
Once you’ve verified the area is completely dry, you can begin the process of repairing and restoring the ceiling. Start by evaluating the damage and choosing appropriate ceiling materials for your repair. If you’re dealing with drywall, use a utility knife to cut out the damaged section, then replace it with a new piece. For a textured ceiling, consider using a spray texture to match the existing finish.
Here’s a quick reference table for common repair techniques:
| Repair Technique | Materials Needed | Steps |
|---|---|---|
| Drywall Replacement | Drywall, Tape, Mud | Cut, fit, tape, mud, sand, paint |
| Ceiling Tiles | Replacement Tiles | Remove old tiles, install new ones |
| Texture Repair | Texture Spray | Spray over patched areas for uniformity |
| Painting | Ceiling Paint | Prime, paint, and confirm even coverage |
Finish up by painting your ceiling for a fresh look!
Frequently Asked Questions
How Can I Prevent Future Ceiling Water Damage?
To prevent future ceiling water damage, you’ll want to employ effective waterproofing techniques and schedule routine inspections. This proactive approach helps you catch issues early, ensuring your home remains safe, secure, and comfortable for everyone.
Should I Hire a Professional for Water Damage Repair?
If you’re facing significant water damage, hiring professional water damage restoration services can save you time and ensure thorough repairs. Their expertise helps prevent further issues, giving you peace of mind in your home.
What Types of Insurance Cover Ceiling Water Damage?
Lots of homeowners face water damage. Most homeowner policies cover ceiling water damage, but always check your coverage limits. Understanding these details ensures you’re prepared when unexpected issues arise.
How Long Does the Repair Process Typically Take?
The repair timeline for ceiling water damage typically ranges from a few days to weeks. It depends on the damage assessment, severity, and necessary repairs. You’ll want to ensure everything’s thoroughly addressed for lasting results.
Are There Health Risks Associated With Water-Damaged Ceilings?
Yes, there are health risks associated with water-damaged ceilings. Mold growth can occur, leading to poor air quality that affects your respiratory health and overall well-being. It’s essential to address any water damage promptly.
Conclusion
In tackling ceiling water damage, think of your home as a ship. Just as a captain must patch leaks to keep the vessel afloat, you’ll need to address each step methodically. By evaluating the damage, stopping the water source, removing affected materials, drying thoroughly, and repairing the ceiling, you’re not just restoring structure; you’re safeguarding your sanctuary. Stay vigilant, and your home will weather any storm, staying strong and dry for years
Recent Posts
10 Best Flood Damage Restoration Methods for Homes
When disaster strikes your home with flood damage, knowing the best restoration methods can make
Top Flood Damage Restoration Techniques for Homes
Floods can devastate homes, yet effective restoration flood damage techniques can bring them back to
Step-by-Step Guide for Ceiling Water Damage Repair
Imagine standing beneath a sagging ceiling, water stains spreading like dark clouds overhead. It’s essential