Contents
When you encounter water damage, understanding essential sanitation techniques is critical. You need to assess the damage first and equip yourself with proper PPE. Effective water extraction is key, followed by thorough cleaning and disinfecting of surfaces. If you don’t act swiftly, the risk of mold growth increases considerably. Each step plays a pivotal role in restoring a safe environment, but the details of each process can make all the difference in achieving an effective repair.
Key Takeaways
- Thoroughly clean all affected surfaces to remove dirt and contaminants before applying disinfectants.
- Select appropriate disinfectants like quaternary ammonium compounds or bleach solutions for effective sanitation.
- Ensure proper application methods that allow for adequate contact time and coverage of disinfectants.
- Maintain good ventilation during sanitation processes to improve air quality and drying.
- Regularly monitor and maintain low humidity levels to prevent mold growth in water-damaged areas.
Assessing the Extent of Water Damage
When you encounter water damage, it’s crucial to assess its extent before initiating repairs. Start with a thorough water damage assessment, inspecting all affected areas, including walls, ceilings, and flooring. Use moisture meters to quantify dampness and locate hidden water pockets. Document your findings meticulously, as this information will guide your repair strategy.
Next, conduct a structural integrity evaluation to determine if the damage compromises the building’s stability. Check for warping, sagging, or visible mold, which can indicate deeper issues. If you notice any structural concerns, consult with a professional before proceeding.
Ensure you understand the full scope of the damage to make informed decisions about restoration. By performing a detailed assessment and evaluation, you’re addressing the immediate problem while safeguarding your property’s long-term health.
This methodical approach fosters a sense of belonging in the community of responsible homeowners.
Personal Protective Equipment (PPE) for Safety
After evaluating the extent of water damage, prioritizing your safety is essential before starting any repair work. Proper Personal Protective Equipment (PPE) types can notably reduce your risk of injury or illness.
Start with waterproof gloves to protect your hands from contaminants. Safety goggles are vital for shielding your eyes from debris and splashes. A respirator mask will help filter out harmful mold spores and airborne particles that can cause respiratory issues.
When selecting PPE, adhere to safety guidelines that recommend wearing sturdy, waterproof boots to keep your feet dry and protected. Consider using a hard hat if there’s a risk of falling debris.
Always check your PPE for damage before use and replace it as needed. By equipping yourself with the right PPE, you’re safeguarding your health and setting a standard for safety in your repair efforts, fostering a culture of care within your team.
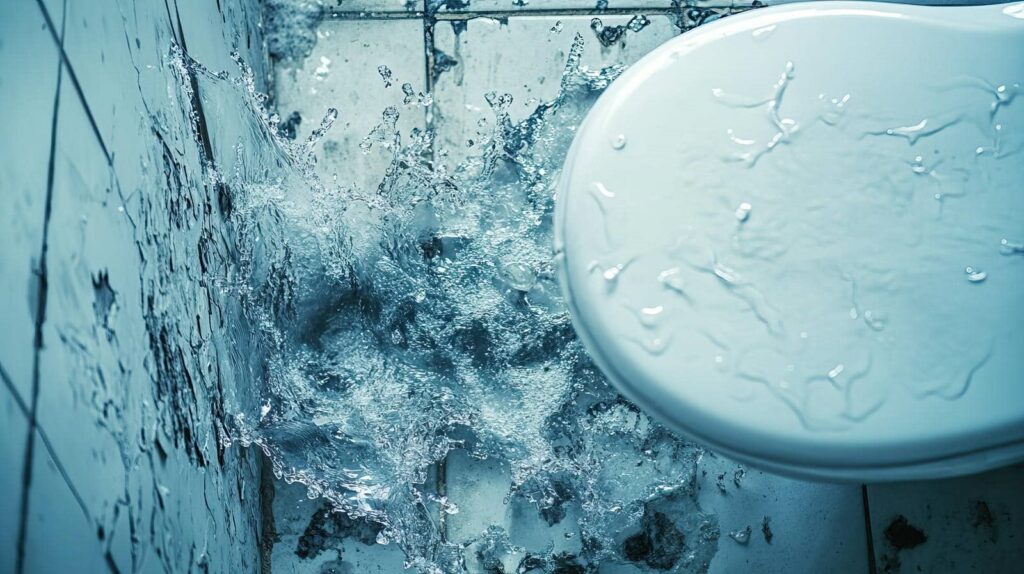
Effective Water Extraction Techniques
In water damage repair, effective extraction techniques are essential for minimizing further damage.
You’ll typically start with pumping out large volumes of water, using submersible pumps for efficiency.
Once the bulk is removed, vacuum extraction methods can effectively eliminate residual moisture from surfaces.
Pumping Out Water
Effective water extraction is essential for mitigating damage during a water intrusion incident. To achieve efficient water removal, you should first assess the area to determine the volume of water present.
Utilize submersible pumps, which are specifically designed for this purpose, to quickly remove standing water. Verify your drainage solutions are in place to direct this water away from the property, preventing further intrusion.
If you encounter debris, clear it away to maintain peak pump performance. Monitor the extraction process closely, adjusting the pump settings as needed for effective results.
Vacuum Extraction Methods
While submersible pumps excel at large-scale water removal, vacuum extraction methods are indispensable for removing residual moisture and ensuring thorough drying.
Various vacuum types, such as wet/dry vacuums and truck-mounted systems, offer distinct advantages in extraction efficiency. Wet/dry vacuums are ideal for small to medium jobs, providing portability and ease of use.
Truck-mounted systems, on the other hand, deliver superior suction power, making them suited for larger areas or extensive damage.
When using these vacuums, make sure to properly seal to maximize air pressure and facilitate efficient moisture removal.
Additionally, consider the material of the surfaces being dried, as this can impact the effectiveness of your chosen vacuum method.
Implementing vacuum extraction techniques will markedly enhance your restoration efforts.
Disinfecting Surfaces and Materials
When you disinfect surfaces and materials after water damage, choosing the right disinfectants is essential for effective sanitation.
You’ll need to follow specific application techniques to ensure thorough coverage and maximum efficacy. This process eliminates harmful pathogens and helps prevent future mold growth and deterioration.
Choosing Effective Disinfectants
Choosing the right disinfectant is essential to ensuring that surfaces and materials affected by water damage are thoroughly sanitized.
Different disinfectant types serve specific purposes, so consider the following options:
Quaternary Ammonium Compounds: Effective against a broad spectrum of bacteria and fungi.
Bleach Solutions: Potent for eliminating mold and mildew, especially on non-porous surfaces.
Hydrogen Peroxide: A safer alternative that’s effective against viruses and bacteria without harsh residues.
Alcohol-based Disinfectants: Quick-drying and suitable for electronics or sensitive materials.
Make sure to evaluate the application methods as well, ensuring ideal contact time and coverage for maximum efficacy.
Selecting the right disinfectant protects your environment and fosters a sense of community responsibility in keeping shared spaces safe.
Proper Application Techniques
To effectively disinfect surfaces and materials after water damage, start by thoroughly cleaning the area to remove any dirt, debris, or contaminants.
Once cleaned, follow established sanitation protocols to ensure excellent results. Choose appropriate disinfectants based on the materials and their compatibility.
Use application methods like spray or wipe; spraying can cover larger areas quickly, while wiping allows for more control on intricate surfaces. Allow the disinfectant to sit for the recommended dwell time to kill pathogens effectively.
Afterward, rinse if necessary, particularly on surfaces that may come into contact with food. Finally, maintain adequate ventilation during the process to enhance air quality.
This methodical approach fosters a safe environment and builds confidence in your sanitation efforts.
Mold Prevention Strategies
Although mold thrives in damp environments, implementing effective prevention strategies can greatly reduce its likelihood in water-damaged areas.
To combat mold growth, focus on moisture control and follow these essential steps:
Dry Wet Areas Quickly: Verify water-damaged surfaces are dried within 24-48 hours to prevent mold spores from settling.
Improve Ventilation: Increase air circulation by opening windows and using fans, which helps keep humidity levels low.
Seal Cracks and Gaps: Inspect your property for any leaks or openings and seal them to prevent moisture intrusion.
Use Mold-Resistant Products: When repairing or renovating, opt for mold-resistant paints and materials to provide an additional layer of protection.
Final Inspection and Quality Assurance
Once the water damage repair process is complete, conducting a thorough final inspection and quality assurance check is essential to ensure the effectiveness of your efforts.
Begin by using a final checklist to evaluate all repaired areas, ensuring each component meets established standards. Inspect for any lingering moisture, mold, or structural issues that could compromise your work.
Next, assess the effectiveness of your drying methods and confirm that all affected materials have returned to acceptable moisture levels. Quality control is key; utilize moisture meters and thermal imaging tools to detect hidden problems.
Don’t forget to engage your team in this process. Encourage their input and observations, fostering a sense of ownership and collaboration.
Document your findings and any necessary adjustments, ensuring a detailed record for future reference. This meticulous approach solidifies your repair efforts and builds trust within your community.
Frequently Asked Questions
How Long Does the Water Damage Repair Process Typically Take?
The water damage repair process typically takes one to two weeks. You’ll need effective water extraction followed by drying equipment to ensure thorough moisture removal and prevent further issues like mold and structural damage in your space.
What Are the Costs Associated With Water Damage Repair?
Water damage repair costs can feel like a surprise party you never wanted. You’re looking at anywhere from a few hundred to several thousand dollars, depending on the extent of damage and necessary repairs.
Can I Repair Water Damage Myself, or Should I Hire Professionals?
You can tackle DIY repairs if you’re confident and knowledgeable, but hiring professional services ensures thoroughness and safety. Professionals have the right equipment and expertise, reducing long-term risks and ensuring your home’s integrity remains intact.
What Types of Insurance Cover Water Damage Repair?
Homeowner policies often cover water damage repair, but you’ll need to check your coverage limits. Understanding your specific policy details helps ensure you’re prepared for any unforeseen water damage situations in your home.
How Can I Prevent Future Water Damage in My Home?
To prevent future water damage, install effective waterproofing solutions and ensure proper moisture control. Regularly inspect your home’s foundation, gutters, and plumbing systems, addressing issues promptly to maintain a dry and safe environment for everyone.
Recap
In the aftermath of water damage, think of your efforts as planting seeds in a garden. By meticulously evaluating, extracting, and disinfecting, you’re cultivating a safe environment free from contaminants. Just as a gardener must nurture their plants, you must monitor humidity and prevent mold growth to ensure a healthy recovery. Your final inspection is the sunlight that allows your hard work to flourish, transforming a damaged space into a sanctuary of safety and well-being.
Recent Posts
10 Best Sanitation Methods for Water Damage Repair
When water damage strikes, do you really know where to begin? Addressing the aftermath requires
Why Choose Professional Sanitation for Water Damage?
When water damage strikes, it’s easy to underestimate the severity and health risks involved. You
Top 5 Sewage Cleanup Techniques for Flood Damage
When a heavy storm causes a sewer backup in your basement, the aftermath can be