
Contents
You probably don’t know that restoration crews often start by finding hidden damage before they touch what you can see. When your home suffers water, fire, or storm loss, you need to secure the structure, document conditions, and control hazards fast. From there, the process moves through cleanup, drying, repairs, and insurance coordination. The details matter, because each step affects how fully your home can recover.
Key Takeaways
- Property damage restoration includes cleanup, repairs, and rebuilding after water, fire, storm, or mold damage.
- The first step is securing the home with board-ups, sealing openings, and preventing further damage or theft.
- Technicians then assess damage, document conditions, and use tools like moisture meters and infrared cameras.
- Restoration may involve drying, debris removal, odor treatment, structural repairs, and replacement of damaged materials.
- Homeowners should manage insurance claims promptly and maintain preventative upkeep to reduce future damage risks.
What Property Damage Restoration Includes
Property damage restoration includes the coordinated cleanup, repair, and rebuilding work needed to return a property to a safe, usable condition after damage from water, fire, smoke, mold, storms, or other incidents.
In the property damage restoration process for homes, you’ll usually see assessment, controlled removal of damaged materials, drying or decontamination, structural repairs, and final finishing.
You may also need odor treatment, debris disposal, and contents handling. Each step helps limit further deterioration and supports code-compliant recovery.
When you understand what’s included, you can speak confidently with contractors, track progress, and stay connected to the restoration team.
The goal isn’t just to fix what’s visible; it’s to restore function, stability, and comfort so you can feel at home again.
How to Secure Your Home After Damage
After damage, you should secure all exposed openings right away to reduce further intrusion and weather exposure.
Install temporary board-ups over broken windows, damaged doors, and other access points to stabilize the structure.
Then lock and seal every usable entry so you can limit theft, contamination, and additional interior damage.
Temporary Board-Ups
When damage leaves openings in your home, temporary board-ups help protect the structure from weather, debris, and unauthorized access. You can use plywood, cut to fit the opening and fastened into solid framing, to create a stable barrier.
Inspect the perimeter first so you know where the structure can support anchors. Measure each opening carefully, then install panels flush against the surface to reduce movement.
If you’re working after a storm or fire, wear gloves, eye protection, and sturdy shoes. Secure boards tightly enough to resist wind, but don’t force fasteners into weakened materials.
These covers buy you time, reduce further loss, and help your home stay part of the neighborhood while repairs move forward.
Lock And Seal Openings
Once the openings are boarded, you should lock and seal every remaining access point to limit theft, weather intrusion, and pest entry. Check all exterior doors, windows, crawl spaces, and garage entries, then replace damaged hardware with temporary locks or hasps.
Apply contractor-grade tape, weatherstripping, and plastic sheeting where gaps remain, keeping moisture and dust out. If utilities are off, label access panels so your team can return quickly and safely.
- Test each lock for a firm latch.
- Seal cracked frames and loose edges.
- Reinspect after rain, wind, or a site visit.
These steps help you protect what’s yours and keep your home ready for the next restoration phase.
How to Assess Water, Fire, and Mold Damage
You should start with a water damage inspection to identify visible saturation, hidden moisture, and affected materials.
Next, assess fire damage by checking structural integrity, smoke residue, and heat exposure.
Then, inspect for mold growth in damp or enclosed areas.
Use these findings to rank the damage, set the restoration scope, and choose the right cleanup methods.
Water Damage Inspection
A thorough water damage inspection starts with identifying the source, extent, and type of damage so you can plan the right restoration steps. You’ll check plumbing leaks, roof entry points, and overflow areas, then document what’s wet, swollen, or stained.
Use a moisture meter and infrared camera to map hidden saturation behind walls and under floors.
- Inspect ceilings, baseboards, and cabinetry for soft spots.
- Test flooring, drywall, and insulation for elevated moisture.
- Record affected rooms, materials, and safety concerns.
This careful review helps you and your restoration team work as one, prioritize drying, and reduce further loss.
If water is still active, shut it off or contain it before conditions worsen.
Accurate inspection gives you a clear path forward and keeps your home recovery moving.
Fire And Mold Assessment
After water intrusion, fire residue, and mold growth can overlap, so you need to assess each damage type separately before restoration begins.
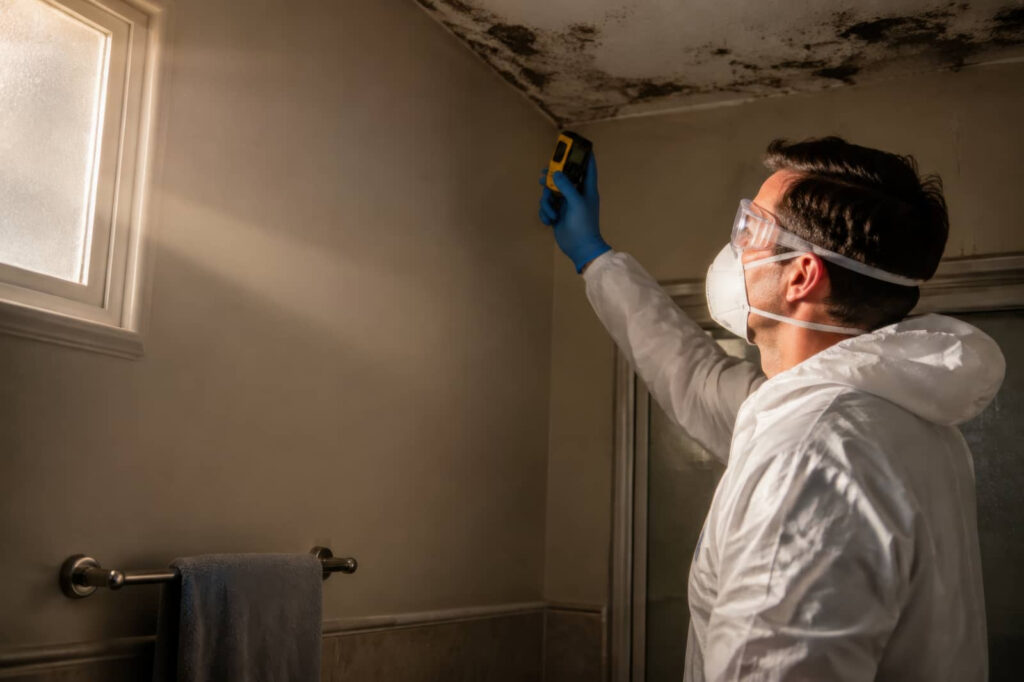
First, document visible soot, charring, warped materials, and moisture stains. Check structural members, insulation, drywall, and HVAC for hidden contamination. Use a moisture meter to confirm damp zones, and note areas where heat weakened surfaces or where smoke odor lingers.
Then inspect for mold on porous materials, especially in humid spaces, basements, and behind damaged finishes.
Wear PPE, photograph every condition, and mark affected rooms for cleanup sequencing. You’ll protect your team and family by isolating hazards early.
A clear assessment helps you decide what can be cleaned, what must be removed, and where specialized testing is needed.
How the Property Damage Restoration Process Starts
When property damage occurs, the restoration process starts with a quick assessment to identify the source, extent, and immediate risks. You’ll want to document visible damage, note odors, moisture, or soot, and confirm which areas are unsafe.
A trained technician then checks structural exposure, utility hazards, and contamination paths so you know what needs priority attention. This first step helps your team act together and avoid guesswork.
- Inspect rooms, ceilings, and hidden spaces.
- Record photos, readings, and damaged materials.
- Set safety controls and define the response plan.
From there, you get a clear scope of work and next steps. That early clarity keeps your home’s recovery organized, efficient, and grounded in the facts.
Cleanup, Drying, and Repair Steps
Once the damage assessment is complete, the restoration crew can move into cleanup, drying, and repair. You’ll see them remove damaged debris, extract standing water, and sanitize affected surfaces to limit further loss.
They’ll use air movers, dehumidifiers, and moisture meters to dry framing, subfloors, and wall cavities until readings return to safe levels. This step matters because hidden moisture can lead to mold, warped materials, and lingering odors.
After drying, they’ll replace insulation, drywall, flooring, or trim as needed, then seal and finish repaired areas so your home feels whole again.
Throughout the process, you can stay informed by asking for progress updates and walkthroughs. A good crew works with you, protects your space, and helps your home get back on track.
How to Manage Your Insurance Claim
To keep your claim moving, notify your insurer as soon as possible and provide your policy number, date of loss, photos, and a brief description of the damage.
Then ask for your claim number and adjuster contact, so you can track every update with confidence. Keep all receipts, emergency service invoices, and contractor estimates in one folder; your documentation helps the process stay organized and fair.
- Record each call, email, and date.
- Share inspection access when the adjuster requests it.
- Review the settlement estimate against the scope of loss.
If anything seems unclear, ask for written clarification before you agree.
You’re not alone in this process, and staying prompt, organized, and factual helps you protect your interests and move your home toward recovery.
How to Prevent Future Property Damage
After the restoration work is complete, you can reduce the risk of repeat damage by fixing the source of the problem, not just the visible symptoms.
Inspect roofing, gutters, plumbing, grading, and seals around windows and doors, then correct leaks, clogs, and cracks fast.
Test sump pumps, alarms, and shutoff valves regularly so you catch failures early.
Keep humidity in check with ventilation and dehumidifiers, and maintain clear drainage away from your foundation.
Schedule seasonal inspections, especially before heavy rain or freezing weather, so your home stays protected.
If you live in a community prone to storms or water intrusion, share maintenance tips with neighbors and stay ready with an emergency plan.
Small, steady upkeep helps your home stay safe, resilient, and part of a prepared neighborhood.
Frequently Asked Questions
How Long Does Property Damage Restoration Usually Take?
It usually takes you a few days to several weeks, depending on damage severity, drying time, materials, and repairs. You’ll move faster if you act quickly, document losses, and coordinate with your restoration team.
Can I Stay in My Home During Restoration?
Sometimes you can, but you shouldn’t if crews remove walls, dry out materials, or handle mold or smoke. You’ll stay safer and feel included when you follow their containment plan, utility checks, and daily access rules.
What Should I Remove Before the Restoration Team Arrives?
Remove small valuables, important documents, medications, electronics, and personal items you’ll need. Clear fragile decor and loose rugs. You should leave structural debris, because the restoration team needs access and documentation.
Do I Need Permits for Major Restoration Repairs?
Yes, you’ll usually need permits for major repairs, especially structural, electrical, plumbing, or HVAC work. You should check with your local building department early, so you avoid delays, fines, and failed inspections.
How Do Restoration Companies Document Hidden Damage?
You document hidden damage with moisture meters, infrared scans, photos, video, and written notes. You’ll label affected materials, map damage locations, and share findings with you and your insurer to support repairs and claims.
Summary
By following a structured restoration plan, you can protect your home, reduce losses, and get back to normal faster. First, secure the property, then assess the damage, document everything, and start cleanup, drying, and repairs without delay. Keep your insurance claim organized and watch for hidden issues that could cause trouble later. With the right steps, you’ll stay ahead of the curve and help ensure your home is safe, sound, and ready for the future.
Recent Posts
Property Damage Restoration: The Complete Guide for Homeowners
After a burst pipe soaks your living room overnight, you’re left wondering what to do
Smoke Damage Cleanup Insurance Claim Guide
Some homeowners’ insurance claims involve property damage from fire or smoke, and a Smoke Damage
Smoke Damage Cleanup Timeline for Homes
After a house fire, you need a cleanup plan that starts immediately and follows a