Contents
When dealing with mold issues, it’s essential to follow a systematic approach to ensure effective mold remediation. Each step, from evaluating the mold situation to conducting air quality testing, plays an important role in eliminating the problem and preventing future growth. Understanding the process can help you make informed decisions about your property’s safety and health. Let’s explore these fundamental steps to safeguard your environment and maintain its integrity.
Key Takeaways
- Assess the mold situation by identifying types present and inspecting moisture-prone areas for visible signs of growth and damage.
- Contain the affected area using physical barriers, sealing entry points, and establishing negative pressure to prevent mold spore spread.
- Use appropriate personal protective equipment (PPE) including respirators, gloves, and protective clothing during the remediation process.
- Remove affected materials safely, sealing them in plastic for disposal according to local regulations to avoid contamination.
- Clean and disinfect surfaces thoroughly, utilizing effective disinfectants and strategies to prevent future mold growth and ensure a safe environment.
Assessing the Mold Situation
When you suspect mold in your property, evaluating the situation is essential. Start by identifying the mold types present, as various species can pose different health risks. Common types include Aspergillus, Cladosporium, and Stachybotrys, which can trigger allergic reactions, respiratory issues, and other health complications.
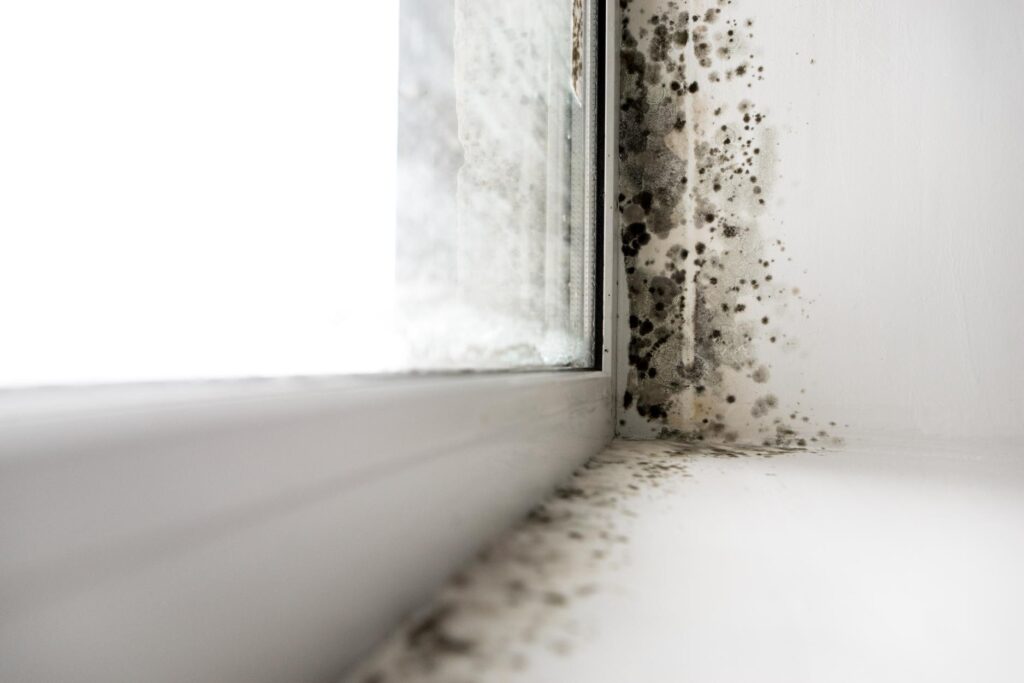
Next, inspect areas prone to moisture, like basements, bathrooms, and around windows. Look for visible signs of mold growth, such as discoloration or musty odors. Use a flashlight to check hidden spots, like behind furniture or inside walls, as mold often thrives in dark, damp environments.
Document your findings with photos and notes, noting the extent of the growth and any water damage. This assessment will help you determine the severity of the situation and guide you in seeking professional remediation services.
Prioritizing this evaluation is vital for protecting your health and ensuring a safe living environment.
Containing the Affected Area
To effectively contain the affected area, you must first isolate contamination zones by using physical barriers.
Next, seal all entry points to prevent mold spores from spreading to unaffected areas.
Finally, establish negative pressure within the containment zone to ensure any airborne spores are directed away from clean spaces.
Isolate Contamination Zones
Isolating contamination zones is essential for effective mold remediation, as it prevents spores from spreading to uncontaminated areas.
Start by identifying mold types and contamination sources within your space. Use physical barriers, like plastic sheeting, to seal off affected areas, ensuring that air can’t flow between zones. This will contain the spores and protect other areas from potential contamination.
Make certain that HVAC systems are shut down during isolation to prevent further spread. Utilize negative air pressure machines if available, as they can help filter out spores while maintaining containment.
Seal Entry Points
As you begin the mold remediation process, sealing entry points is essential for containing the affected area. This step prevents spores from spreading and maintains a controlled environment. Implement effective sealing techniques and mold prevention strategies to ensure success.
Here’s a table outlining key-sealing methods:
| Sealing Method | Description | Purpose |
|---|---|---|
| Caulk | Fill gaps and cracks | Prevent air and moisture |
| Plastic Sheeting | Cover large openings | Create a barrier |
| Weatherstripping | Seal doors and windows | Reduce air leakage |
| Foam Sealant | Insulate around pipes and vents | Block moisture entry |
Establish Negative Pressure
After sealing entry points, establishing negative pressure in the affected area is essential for effective mold remediation. This process prevents mold spores from escaping into unaffected spaces during cleanup.
Use a high-efficiency particulate air (HEPA) filter to create a negative pressure environment. Position the air filtration device at the entrance to the contaminated area, ensuring it exhausts air outside.
Adjust the airflow to maintain consistent negative pressure, which can be monitored using manometers or pressure gauges. Regularly check the filters to confirm ideal performance and replace them as needed.
Personal Protective Equipment (PPE) Usage
When you’re tackling mold remediation, using Personal Protective Equipment (PPE) is essential for your safety.
You’ll need to understand the different types of PPE available and follow proper usage guidelines to ensure maximum protection.
Let’s explore the importance of PPE, the various types, and how to use them correctly.
Importance of PPE
While tackling mold remediation, understanding the importance of Personal Protective Equipment (PPE) is essential for your safety and health.
PPE protects you from harmful mold spores and chemicals, ensuring you can work without risking respiratory issues or skin irritation. Familiarizing yourself with PPE regulations is critical, as they outline the minimum standards for equipment required in hazardous environments.
The benefits of using PPE extend beyond personal safety; they also enhance overall project efficiency by reducing downtime and health-related incidents. By committing to proper PPE usage, you foster a culture of safety and responsibility among your team, ensuring everyone’s well-being.
Types of PPE
Selecting the right types of Personal Protective Equipment (PPE) is vital for effective mold remediation.
You’ll need to choose appropriate respirator types to safeguard yourself from airborne spores. For most situations, a half-mask respirator with P100 filters will provide adequate protection. If you’re dealing with extensive mold contamination, consider a full-face respirator for added safety.
In addition to respirators, protective clothing is important. Opt for disposable coveralls made of impermeable material to prevent mold spores from making contact with your skin.
Don’t forget to wear gloves and goggles to shield your hands and eyes from irritants. By selecting the right PPE, you ensure a safer working environment and promote a sense of belonging within your team, knowing you’re all protected.
Proper Usage Guidelines
Using Personal Protective Equipment (PPE) correctly is just as important as choosing the right gear for mold remediation. Start by inspecting your PPE for any damage before each use.
Make certain your respirator fits snugly, as a proper seal is essential for effective protection. It’s critical to wear gloves and goggles to prevent direct contact with mold spores.
Adhering to remediation best practices means changing your PPE if it becomes contaminated. Always follow mold prevention strategies, like maintaining a clean workspace and proper ventilation, to minimize exposure.
After completing the job, carefully remove your PPE in a manner that avoids cross-contamination. By adhering to these guidelines, you protect yourself and foster a safer environment for everyone involved.
Removing Affected Materials
Before you begin the mold remediation process, it is essential to remove any affected materials to prevent further contamination and health risks. Identify materials like drywall, carpet, or insulation that show signs of mold growth. Utilize proper mold removal techniques to safely remove these materials. Make certain you wear protective gear during this process.
Here’s a concise guide for affected material disposal:
| Material Type | Disposal Method |
|---|---|
| Drywall | Seal in plastic bags |
| Carpet | Cut into small sections |
| Insulation | Double-bag and seal |
| Furniture | Clean or discard |
Dispose of materials in accordance with local regulations. Properly handling affected materials protects your health and ensures a more effective remediation process. By taking these steps, you contribute to a safer living environment for you and your loved ones.
Cleaning and Disinfecting Surfaces
Before applying disinfectants, you need to prepare the surfaces by removing any debris and contaminants.
Once the surfaces are clean, use appropriate methods to apply your chosen disinfectant effectively.
This ensures maximum efficacy in eliminating mold spores and preventing future growth.
Surface Preparation Techniques
When tackling mold remediation, effective surface preparation is essential to ensure successful cleaning and disinfecting.
Start by selecting the right preparation tools, such as scrapers, brushes, and vacuum equipment with HEPA filters, to remove any visible mold growth.
Next, explore various surface treatment options, like soap and water, or specialized mold removal solutions, to ensure thorough cleaning.
After removing the mold, it’s important to dry the surfaces to prevent regrowth.
Pay close attention to hidden areas, such as behind appliances or under carpets, where mold may thrive.
Finally, always wear appropriate personal protective equipment to safeguard yourself during the process.
Proper surface preparation sets the foundation for effective mold remediation and helps maintain a safe environment for everyone.
Disinfectant Application Methods
After completing surface preparation, the next step involves applying disinfectants to confirm thorough cleaning and eliminate any remaining mold spores.
You’ll want to choose appropriate disinfectant types, such as chlorine bleach or hydrogen peroxide, depending on the surface material and contamination level.
For effective application techniques, use a spray bottle or pump sprayer to evenly distribute the disinfectant, confirming complete coverage.
Allow the disinfectant to sit for the recommended contact time to maximize its effectiveness.
Afterward, wipe surfaces with a clean cloth or sponge, removing any residue.
Don’t forget to ventilate the area during and after application to confirm safety.
Following these steps fosters a safe, mold-free environment, reinforcing your commitment to health and well-being.
Drying the Area Thoroughly
To effectively prevent mold from returning, you must dry the affected area thoroughly and promptly. Start by removing any standing water using pumps or wet vacuums.
Once the bulk of the moisture is eliminated, focus on enhancing air circulation. Open windows and doors to promote ventilation, or use fans and dehumidifiers to accelerate the drying process.
Monitor the humidity levels; aim to keep them below 60% to achieve ideal moisture control.
Inspect all surfaces for dampness, paying special attention to concealed areas like behind walls or under carpets. Verify that materials such as drywall or wood are completely dry, as residual moisture can lead to mold resurgence.
By implementing these strategies, you’ll create an environment that discourages mold growth and fosters a healthier living space.
Preventing Future Mold Growth
Although drying the affected area is essential, preventing future mold growth requires ongoing vigilance and proactive measures.
To safeguard your environment, implement the following strategies:
- Use mold-resistant materials, especially in high-moisture areas like bathrooms and kitchens.
- Maintain humidity control by using dehumidifiers and ensuring proper ventilation.
- Regularly inspect and repair any leaks in plumbing or roofing to prevent moisture accumulation.
- Clean and maintain gutters to avoid water damage that could lead to mold growth.
Conducting Air Quality Testing
When mold is suspected in your environment, conducting air quality testing becomes essential for accurately evaluating the extent of contamination. Start by choosing appropriate air sampling techniques, such as spore traps or cassette sampling, to capture mold spores in the air.
It’s important to follow standardized protocols to ensure reliable results. Once you’ve collected the samples, send them to a certified laboratory for analysis.
Lab analysis methods will identify the types and concentrations of mold present, providing a clear picture of the air quality. Pay attention to the findings, as they can help you determine the need for remediation and inform your next steps.
Engaging with professionals who understand these processes can enhance your confidence in tackling mold issues effectively. Remember, accurate air quality testing is crucial in safeguarding your health and maintaining a safe living or working environment.
Documenting the Remediation Process
As you navigate the mold remediation process, documenting each step is essential for ensuring compliance and effectiveness.
Proper documentation methods create a clear record and support your remediation reports, ensuring all actions taken are verifiable and transparent.
- Capture initial assessments and findings.
- Record the procedures used for mold removal.
- Document air quality testing results before and after remediation.
- Keep a timeline of all actions taken throughout the process.
Final Inspection and Follow-Up
Once you’ve completed the mold remediation process, conducting a final inspection is essential to confirm that all mold has been effectively removed and that the environment is safe for reoccupation.
During this inspection, you’ll want to check all previously affected areas, verifying no signs of mold remain. Utilize moisture meters and air quality tests to validate that the air is clean and dry.
After the inspection, compile a final report detailing the findings, including photographs and data from tests conducted. This report will serve as documentation and an important communication tool for you and your team.
Encourage client feedback to understand their concerns and experiences throughout the remediation process. This input can help improve future services and ensure that clients feel supported and valued.
Wrap-Up
By following these 10 essential steps for mold remediation, you’re not just cleaning up; you’re reclaiming your space. Imagine a home where fresh air flows freely and your family thrives without the threat of mold lurking in the shadows. Each careful action—from evaluating and containing to the final inspection—ensures a safe, healthy environment. Stay vigilant with humidity levels and maintenance to keep your sanctuary mold-free, allowing sunlight and peace to fill every corner of your home.
Recent Posts
Why Choose Professional Sanitation for Water Damage?
When water damage strikes, it’s easy to underestimate the severity and health risks involved. You
Essential Sanitation Techniques for Water Damage Repair
When you encounter water damage, understanding essential sanitation techniques is critical. You need to assess
Top 5 Sewage Cleanup Techniques for Flood Damage
When a heavy storm causes a sewer backup in your basement, the aftermath can be